How to Waterproof a Concrete Floor Under a Canopy?
maj 29, 2024
Spiral Anchors for Masonry Reinforcement
sierpień 1, 2024Bauder Liquitec PU Detal
Simple and Reliable Waterproofing for Complex Roof Penetrations and Connection Areas
Installation Guide for Bauder Liquitec PU Detal
Effective waterproofing is crucial, especially for detailing, connection areas, and complex roof penetrations. Bauder Liquitec PU Detal ensures secure and straightforward waterproofing of intricate roof penetrations and connection areas. Made from polyurethane-based liquid plastic, it is perfectly suited for connecting flat waterproofing layers (bitumen or membrane) with penetrations and upstands.
This product is optimized for various waterproofing applications, particularly in connection areas, such as bitumen or synthetic waterproofing upstands on parapets, wall connections, and roof penetrations. With enhanced thixotropic properties (thickening), the product provides reliable waterproofing for these complex areas.
Applications
- Connecting different materials
- Roof penetrations
- Constructing detailed features
- Complex roof constructions
- Special geometric forms
Bauder Liquitec PU Detal is user-friendly and ready-to-use without the need for component mixing, significantly speeding up and simplifying the application process. Its unique properties mean it does not require priming on most substrates, such as slate-covered bitumen membranes, concrete, screed, metal, or wood. Moreover, the product is solvent-free and contains no hazardous substances, making it safe for users and the environment.
Key Features of Bauder Liquitec PU Detal
- Ease of Use: Ready-to-use without the need for mixing components.
- No Priming Required: Compatible with most substrates, including bitumen membranes, concrete/screed, metal, and wood.
- Eco-Friendly: Solvent-free, odorless, and free of hazardous substances.
- Re-sealable Packaging: Allows for multiple uses.
- Temperature Resilience: Suitable for installation even at high temperatures.
- UV Stability: Resistant to UV radiation.
- Alkali Resistance: Durable in high-alkaline environments.
Why Choose Bauder Liquitec PU Detal?
Bauder Liquitec PU Detal is ideal for durable and efficient waterproofing of roof penetrations and connection areas. Its straightforward application process and exceptional performance properties make it a top choice for professionals seeking long-term protection and reliability in challenging construction scenarios.
General Guidelines for Applying Bauder Liquitec PU Detal
Substrate Preparation:
- Ensure the substrate is clean, dry, load-bearing, and free of contaminants such as cement residues, oils, sealing agents, dirt, grease, algae, or fungi.
- The final surface moisture content should be less than 6%.
Application Conditions:
- Substrate Temperature: Between +5°C and +55°C.
- Relative Humidity: Between 30% and 90%.
Substrate Priming:
- Refer to the "Recommendations for Substrate Pre-Treatment" table in the installation manual for specific guidance on substrate preparation and priming.
Product Application:
- Mixing: Stir Bauder Liquitec PU before use until a homogeneous consistency is achieved.
- Ready-to-Use: The product is pre-mixed and can be applied directly from the bucket.
- Layering: Apply Bauder Liquitec PU in two layers:
- First Layer: Apply the first coat and embed the fleece reinforcement into the wet layer, ensuring it is laid without gaps or wrinkles.
- Second Layer: Immediately apply the second coat over the fleece using the "wet-on-wet" method.
Using Bauder Liquitec PU Detal
Using Adhesive Tape:
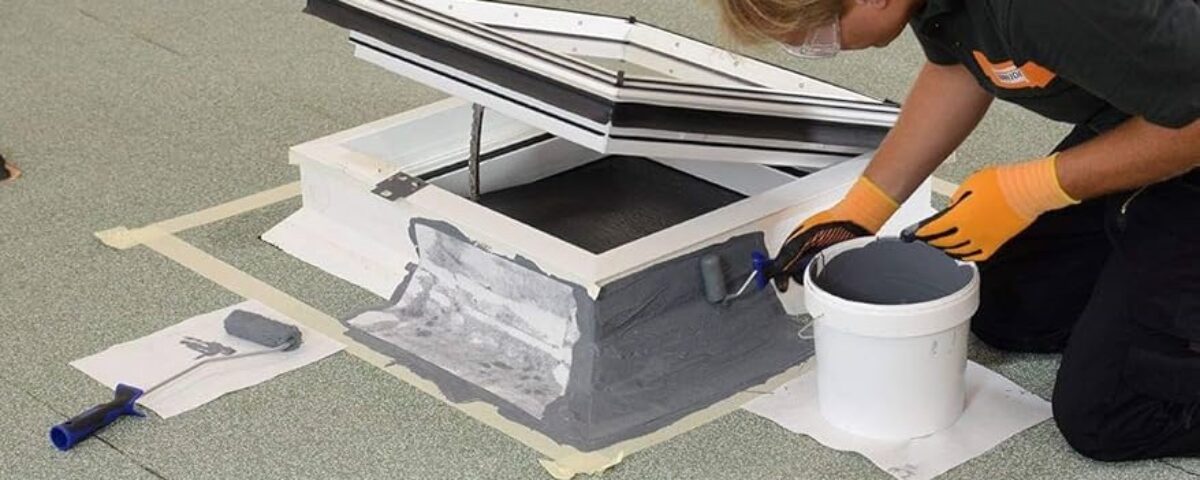
- Before applying the waterproofing material, mark off the working area with adhesive tape.
- Cover any foreign material with at least 10 cm of Bauder LIQUITEC PU to ensure proper sealing.
Product Consumption:
- The consumption rate is approximately 3.1 kg/m², ensuring the required minimum layer thickness.
- The surface of the waterproofing layer should be smooth, with no visible structure of the polyester fleece.
Safe Installation:
- Use the appropriate Bauder LIQUITEC tools and accessories for the application.
Drying Time:
- Rain Resistance: The product becomes rain-resistant after approximately 30 minutes.
- Walkable: The surface can be walked on after 4-8 hours at a temperature of 20°C.
Storage:
- Opened containers can be stored if tightly resealed and reused until the expiration date. Ensure proper storage conditions as recommended by the manufacturer.
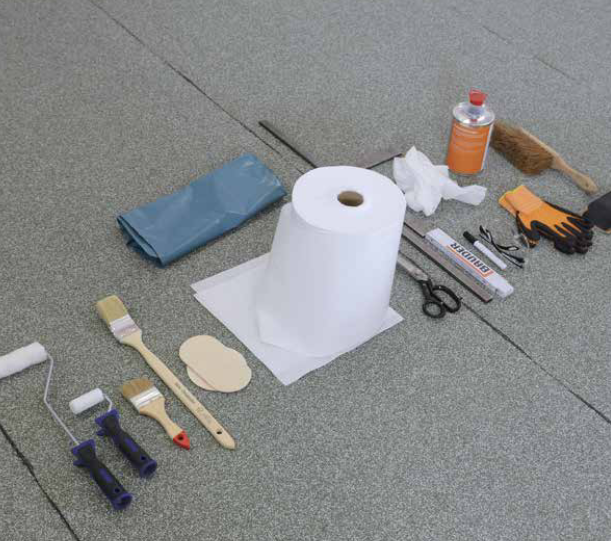
Bauder LIQUITEC PU Detal - Step-by-Step Installation Guide
Bauder LIQUITEC PU is a single-component liquid plastic system designed for waterproofing. To ensure effective and durable waterproofing, follow these steps:
Step 1: Surface Preparation
- Clean and Dry the Surface:
- The surface must be stable, clean, and dry, with a final moisture level below 6%.
- Remove Contaminants:
- Ensure the surface is free of cement residues, efflorescence, grease, and loose materials.
- Patch Defects:
- Use an appropriate filler (e.g., BauderLIQUITEC PMMA-SM) to level surface defects.
- Reinforce Cracks:
- For cracks and joints, lay a polyester fleece reinforcement before applying the coating.
- Priming:
- Apply the primer so that the primed area is slightly larger (5-10 mm) than the intended waterproofing area.
- Crack Filling:
- Fill moving cracks and expansion joints according to applicable technical guidelines.
Step 2: Define the Work Area with Tape
- Apply Masking Tape:
- Use adhesive tape to mark the work area and prevent the material from spreading beyond the designated zone.
- Ensure the tape is applied in a way that allows easy removal later.
- Prime the Area:
- Apply the primer slightly beyond the waterproofing zone (5-10 mm overlap).
- Tape Removal Between Layers:
- If applying multiple layers, remove the tape before the material cures. For subsequent layers on a dry surface, reapply fresh tape before continuing.
Step 3: Application of Bauder LIQUITEC PU
- Mix the Product:
- Stir Bauder LIQUITEC PU until the consistency is uniform.
- First Layer:
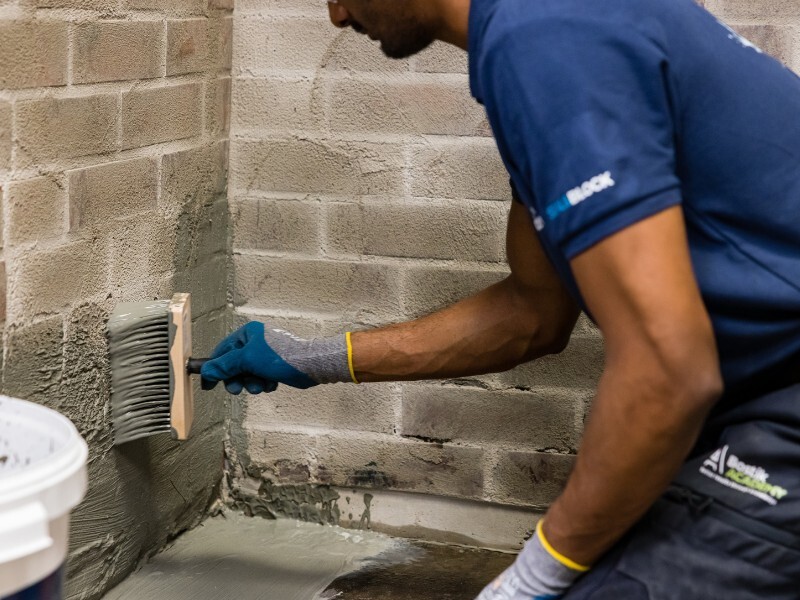
- Apply the first layer of Bauder LIQUITEC PU evenly on the prepared surface.
- Lay the polyester fleece reinforcement into the wet coating without wrinkles or air pockets.
- Second Layer:
- Immediately apply the second layer of Bauder LIQUITEC PU over the fleece using the “wet-on-wet” method to achieve the required minimum thickness.
Additional Tips:
- Remove Tape: Peel off the masking tape carefully before the product dries to ensure clean edges.
- Reapply Tape: If additional layers are needed after curing, apply new tape to maintain clear boundaries.
- Curing Time: Allow each layer to dry before walking or applying additional coatings, as per the manufacturer’s instructions.
Step 3: Mixing the Liquid Plastic
- Mixing:
- Bauder LIQUITEC PU is ready for use directly from the container but must be thoroughly mixed to achieve a uniform color and consistency. Mixing can be done manually or with a machine.
- Safety Precautions:
- Always wear protective gloves, safety goggles, and other appropriate personal protective equipment (PPE) during application.
Step 4: Application of the First Layer
- Apply the First Layer:
- Evenly spread the first layer of liquid plastic onto the prepared, dry surface. Use approximately 2/3 of the declared material quantity for this layer.
- Tools:
- Application can be done using brushes, rollers, or trowels, depending on the surface and detail requirements.
Step 5: Placement of the Polyester Fleece
- Apply the Fleece:
- While the first layer is still wet, lay the BauderLIQUITEC VL165 polyester fleece onto the surface. Ensure the fleece is free of air bubbles, wrinkles, or folds and that it is sufficiently saturated with the liquid material.
- Prepare the Fleece:
- Pre-cut the fleece into sections before applying the first layer, leaving a 5 mm gap around areas where masking tape will be applied.
Step 6: Application of the Second Layer
- Apply the Second Layer:
- Immediately after placing the fleece, apply the second layer of Bauder LIQUITEC PU using the "wet-on-wet" method. This ensures complete encapsulation of the fleece.
- Layer Thickness:
- The total thickness of the waterproofing system should be at least 2.5 mm, corresponding to a consumption of approximately 3.1 kg/m².
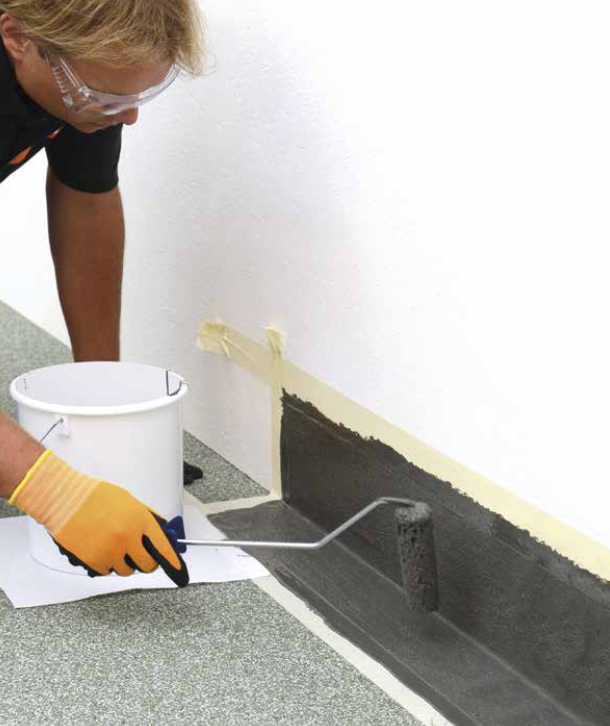
Step 7: Removing the Masking Tape
- Removing the Tape:
- Carefully remove the masking tape before the liquid plastic begins to cure.
- Drying Time:
- The product is rain-resistant after approximately 30 minutes, and it becomes walkable after 4-8 hours, depending on the ambient humidity and temperature conditions.
Optional Additional Steps
Additional Layer Application:
- If necessary, apply an extra layer of Bauder LIQUITEC PU within 16 hours of the previous application.
- If more than 16 hours have passed, the surface must be sanded before adding another layer to ensure proper adhesion.
Bonding Layer:
- To create a bonding layer, apply an additional coat of Bauder LIQUITEC PU and sprinkle fine-grained, kiln-dried quartz sand onto the wet layer.
- Once the layer has hardened, vacuum away any excess sand.
Ensuring Effective and Durable Waterproofing
By meticulously following these steps, Bauder LIQUITEC PU guarantees a robust and long-lasting waterproofing system, even for challenging and intricate roof details.
Detailed instructions for shaping specific details can be found in the provided technical documentation.


